Development Uploader pre 5.0
This documentation is currently being revised
Contents
About
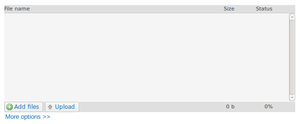
The Contrexx Uploader is a core component of Contrexx that handles file uploads. It takes care about security considerations (i.e. blocking upload of malicious file types), file permission issues (due to insufficient write access) and removes the server-side upload file-size limitation. The general usage of the Contrexx Uploader in Contrexx ensures a consistent and stable way of performing file upload operations throughout the whole system.
Note: This documentation refers to version 4 or older. For newer versions of Cloudrexx, please refer to Uploader.
Technical Information
Workflow
An overview Figure is available at http://www.contrexx.com/wiki/manual_upload/uploader.png
SVG version (improved readability but some people might experience display issues) at http://www.contrexx.com/wiki/manual_upload/uploader.svg
Types of Upload
As seen in the overview figure, new uploaders can be created using the UploadFactory. The following types of uploaders exist:
| Type | Description |
|---|---|
| pl | PlUploader (flash) http://www.plupload.com/ |
| jump | JumpLoader (java) http://jumploader.com/ |
| form | HTML file inputs (user can add as many inputs as he wants) |
| combo | Combination of pl, jump and form. The first supported uploader from [pl, jump, form] is shown. The user can switch between the different flavours of uploaders if he wants to. |
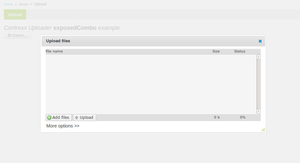
| exposedCombo | Combo, but in a modal dialog box. See for example the image upload in the gallery: http://demo.contrexx.com/cadmin/index.php?cmd=gallery&act=upload_form |
Integration
The integration consists of two steps:
- Uploader initialization in PHP controller and integration in HTML template
- The uploader must be initialized in PHP. This is usually done in either the Backend- or Frontend-Controller of the module where the uploader shall be integrated.
- Additionally, the HTML/JS/CSS code required to run the initialized uploader as well as the GUI integration (i.e. Browse-button) has to be integrated in the HTML template.
- Handling the uploaded files through a self defined callback-function
- A callback-function must be defined to handle the uploaded files. Best practice is to define the static callback-function as a static method in the same class as the uploader initialization code has been placed.
1: Initialization & Template Integration
The following sections show some examples of various usages of the Contrexx Uploader:
- Example #1: Basic Integration
- Example #2: Modal Dialog Integration
- Example #3: File Input with Upload-List Integration
- Example #4: Integration of multiple uploaders on same page
- Example #5: Limit upload to only one file
Each of the following integration examples contains a Uploader initialization and a HTML Template part. Put the PHP code of Uploader initialization into your Backend- or Frontend-Controller and the code of the HTML Template part into the template (either associated Content Page for Frontend or backend-template for Backend integration) of your module where you want to integration the Contrexx Uploader.
Afterwards continue with step 2: Handling uploaded files to define the callback-function that will handle the uploaded files (i.e. moving the files into the desired place).
Example #1: Basic Integration
This basic example places the Contrexx Uploader as an inline element into the HTML-document.
- Uploader initialization
// Create an combo uploader
$uploader = \UploadFactory::getInstance()->newUploader('combo');

// Specifies the function to call when upload is finished. Must be a static function.
$uploader->setFinishedCallback(array(__FILE__, __CLASS__, 'uploadFinished'));

// Add uploader to template
$template->setVariable('UPLOADER_CODE', $uploader->getXHtml());- HTML template
{UPLOADER_CODE}Example #2: Modal Dialog Integration
This example uses a button "Browse.." to open the Contrexx Uploader in a modal dialog.
- Uploader initialization
// Create an exposedCombo uploader
$uploader = \UploadFactory::getInstance()->newUploader('exposedCombo');

// Specifies the function to call when upload is finished. Must be a static function.
$uploader->setFinishedCallback(array(__FILE__, __CLASS__, 'uploadFinished'));

// Add uploader to template
$template->setVariable('UPLOADER_CODE', $uploader->getXHtml());- HTML template
{UPLOADER_CODE}
<!--
    The following button is used to open the Contrexx Uploader in a modal dialog.
    Basically any HTML-element can be used for this as long as the HTML-attribute "id" is set to "exposedComboUploaderStarter"
 -->
<button id="exposedComboUploaderStarter">Browse...</button>
Example #3: File Input with Upload-List Integration
This example uses a HTML-file-input element to open the Contrexx Uploader in a modal dialog. All uploaded files will be displayed in a Folder-Widget.
...
Example #4: Integration of multiple uploaders on same page
Example #5: Limit upload to only one file
This example is based on the example Basic Integration with the addition to restrict the upload to one single file. This restriction is acheived by setting the third parameter of the factory method \UploadFactory::getInstance()->newUploader() to true. See callback-function Example #2: Restrict upload to one file below on how to apply the restriction on server-side.
- Uploader initialization
// Create an combo uploader that allows only one file to be uploaded
$uploader = \UploadFactory::getInstance()->newUploader('combo', 0, $restrictUpload2SingleFile = true);

// Specifies the function to call when upload is finished. Must be a static function.
$uploader->setFinishedCallback(array(__FILE__, __CLASS__, 'uploadFinished'));

// Add uploader to template
$template->setVariable('UPLOADER_CODE', $uploader->getXHtml());- HTML template
{UPLOADER_CODE}Advanced Uploader
- Upload initialization
$this->myTemplate->loadTemplateFile('test.html');

// The uploader needs the framework
\JS::activate('cx');

// Name of the upload instance
$uploaderInstanceName = 'exposed_combo_uploader';

// jQuery selector of the HTML element where the upload folder widget shall be put in
$uploaderFolderWidgetContainer = '#uploadWidget';

// Create an exposedCombo uploader
$uploader = \UploadFactory::getInstance()->newUploader('exposedCombo');

// Set instance name so we are able to catch the instance with javascript
$uploader->setJsInstanceName($uploaderInstanceName);

// Specifies the function to call when upload is finished. Must be a static function.
$uploader->setFinishedCallback(array(
    ASCMS_MODULE_PATH . '/Test/TestManager.class.php',
    '\Cx\Modules\Test\TestManager',
    'uploadFinished'
));

// Optional data to pass to the callback function
$data = array();
$uploader->setData($data);

// Create images path if not exist
if (!is_dir($this->imagesPath)) {
    \Cx\Lib\FileSystem\FileSystem::make_folder($this->imagesPath);
    \Cx\Lib\FileSystem\FileSystem::makeWritable($this->imagesPath);
}

// Optional: Initialize the folder widget displaying the files of the temp folder
$folderWidget = \UploadFactory::getInstance()->newFolderWidget($this->imagesPath);

// Code for the click event on the upload input
$extendedFileInputCode = '
    <script type="text/javascript">
        cx.include(
            ["core_modules/contact/js/extendedFileInput.js"],
            function() {
                var ef = new ExtendedFileInput({
                    field: $J("#file-upload")
                });
            }
        )
    </script>
';

// Add uploader and folder widget code
$this->myTemplate->setVariable(array(
    'UPLOADER_CODE'      => $uploader->getXHtml(),
    'FILE_INPUT_CODE'    => $extendedFileInputCode,
    'FOLDER_WIDGET_CODE' => $folderWidget->getXHtml($uploaderFolderWidgetContainer, 'uploadWidget'),
));- HTML-Template
{UPLOADER_CODE}
{FOLDER_WIDGET_CODE}
{FILE_INPUT_CODE}

<div id="uploadWidget"></div>
<input type="file" name="fileUpload" id="file-upload" />
2: Handling uploaded files
The callback function configured in 1 receives the following arguments:
| Name | Content |
|---|---|
| tempPath | Path to the temporary directory containing the files at this moment. |
| tempWebPath | Points to the same folder as tempPath, but relative to the webroot. |
| data | Data given to setData() when creating the uploader. |
| uploadId | Per-session unique id for the current upload. |
| fileInfos | array('originalFileNames' => array( 'theCurrentAndCleanedFilename.txt' => 'raw!Source#Filename.txt' ) ) |
| response | UploadResponse object |
The return value can be an array as shown in the example or null. When returning an array, all files left in the temporary directory are moved accordingly. When returning null, all left files are deleted.
public static function uploadFinished($tempPath, $tempWebPath, $data, $uploadId, $fileInfos, $response) {
    // Edit uploaded files if you want
    // ...

    // Absolute and relative path to the directory we want the uploaded files
    return array(ASCMS_MODULE_PATH . '/Test/images', ASCMS_MODULE_WEB_PATH . '/Test/images');
}
Example #1: Basic callback-function
- Callback-function
This Callback-function will move all uploaded files to the default File Management (defined by ASCMS_CONTENT_IMAGE_PATH) location of Contrexx.
public static function uploadFinished($tempPath, $tempWebPath, $data, $uploadId, $fileInfos, $response) {
    // Specify the absolute and relative path of the directory where the uploaded files
    // shall be moved to
    return array(ASCMS_CONTENT_IMAGE_PATH, ASCMS_CONTENT_IMAGE_WEB_PATH);
}
Example #2: Restrict upload to one file
Example #3: Advanced upload handling using session data
Good to know
- The "AJAX status polling" is done every second. It allows the uploader to detect a successfully transferred and processed upload. The server responds with an empty answer until the upload is finished.
- Malicious files (.php, .exe and so on, determined by FWValidator::is_file_ending_harmless()) aren't uploaded at all.
Known issues
Issue: Uploaded files do not reach the destination directory
- Do tmp and the target directory have full read/write access?
- When using FTP: Is the FTP login correct?
Tracking down problems is easier when using the "simple uploader" and activated debugging - when doing so, errors are shown directly in the browser instead of getting hidden in an invisible request.
Issue: The upload button stays deactivated (gray).
Do Firebug or the Opera/Chrome developer toolbar show an error such as Uncaught TypeError: Object [object Object] has no method 'dialog?
If yes, jQuery has been included twice. The second jQuery (search the page source for "jQuery") has to be removed.
Issue: The files are not uploaded completely
Even though the file is smaller than the limits defined in the PHP configuration (upload_max_filesize and post_max_size), only a part of the file is uploaded to the server.
Systems running on FastCGI need to have FcgidMaxRequestLen configured.

